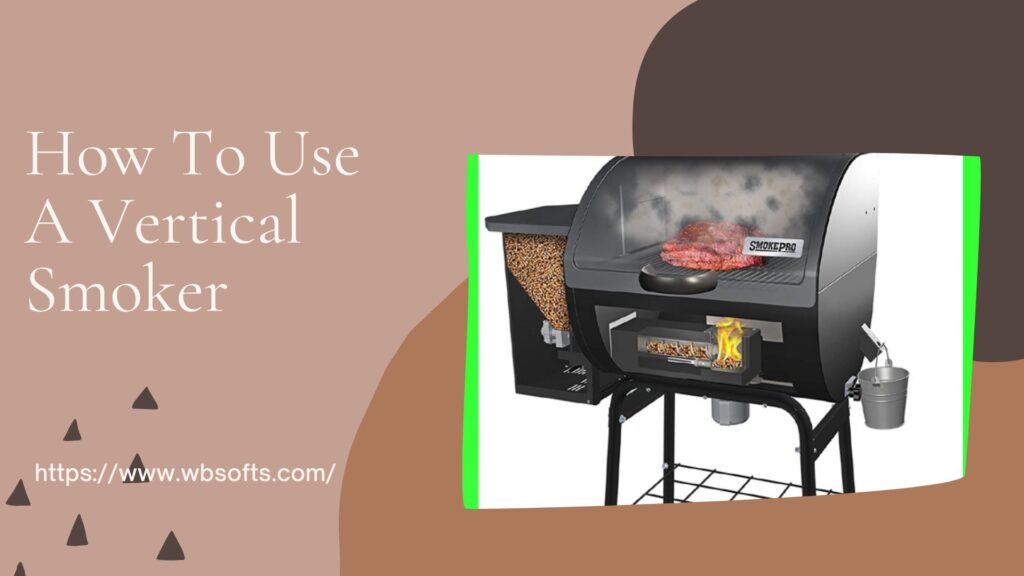
Step-by-step instructions for using a vertical smoker
Figuring out how to use a smoker can be confusing, especially if you haven’t tried using one before. However, as long as you find some way to use it, you can enjoy smoked food with virtually no problem.
That is exactly what we will discuss here. In this article, we will walk you through the steps you need to take to get you started smoking meat using an upward smoker.
Vertical smokers are widely known because they are too easy for beginners to use.
Also called “projectile smokers”, this type of smoker is smaller and smaller, making it ideal for having a smoke get-together or having a barbecue on the deck.How To Use A Vertical Smoker.
What is a Vertical Smoker?
In all honesty, you can simply call any smoker an up smoker for as long as he is facing up. This means that it can come in a few varieties depending on the fuel you use. Some genuine models are rising charcoal smokers, large drum smokers, electric smokers, and water smokers.
Vertical charcoal smokers feature a rising box or chamber in which the fire is lit at the bottom of the cooking chamber (for a water smoker or box smokers) or in a hearth associated with the chamber (for a smoker offset upwards).
One of the reasons that vertical charcoal smokers are hearty hobbyists is because they have no mechanical or electrical parts. This removes the requirement to classify which part is associated with which part or why this part doesn’t work, and so on.
The condition with an upward smoker is that it has a small chamber, so it can cook a few pieces of meat simultaneously.
In any case, it’s still big enough to fit in 2-4 10lbs. pork shoulders or more than 10 baby ribs. The best aspect of upright smokers is that they are among the least expensive, all things considered.
Due to their reasonable cost, they are effectively open to people who need to get their hands on smoked meat without spending a ton. They’re even designed to be lightweight and compact, so you can move them around your yard, except for electric smokers that require a nearby power outlet.
There are a couple of drawbacks to upright smokers. As mentioned above, they’re minuscule, so the amount of meat you can cook simultaneously is restricted. There’s also the way that the water pan can get dirty easily, and that means you’ll need to wash it after every use.
Finally, upright smokers are intended for barbecue smoking only.
How do vertical smokers work?
An upward smoker comes in three separate segments which are as follows:
The cooking chamber where the meat is placed to be smoked
The water dish holds the liquid that helps keep the meat soaked during the smoking session.
The hearth is located in the base where the fuel is added.
The hearth is the source of heat that gives intensity to the entire smoker. The smoker works by raising the intensity and smoking directly into the cooking chamber. However, the intensity and the smoke initially pass through the water tank, heating it all the time.
The presence of water essentially adds moisture to the smoke which therefore makes the meat delicate and deliciously flavorful.
However, some steakhouses prefer to use other liquids, such as juice or lager, instead of water to add a distinct, smoky flavor to their meat.
All of this smoking interaction allows you to smoke meat, but this will generally require a couple of hours depending on the type of meat you want to cook.
Basically, you simply put fuel in the firebox, light it up, place the meat inside the chamber, close the lid, and then let the smoker do its thing.
The most efficient method of using a vertical charcoal smoker
Now that we had a brief overview of what a smoker is and how it works, we should now figure out how to use a smoker, particularly assuming it’s the most memorable moment you use.
Here is a step-by-step guide that you can follow so you can start smoking food effectively:
STEP #1: SET UP YOUR SMOKER
Before you begin, you first need to set your vertical smoker to a perfect balance where you can get to your meat and are a safe distance from any structures. You would have to dismantle your smoker and then at that point put the base in your favorite spot.
Similarly, make sure you put it on level ground. You don’t need obstacles nearby. When you have finished setting up your smoker, you are ready to move on to the next stage.
STEP #2: LIGHT SMOKER (ADD WOOD CHIPS)
The next step is lighting your smoker. This cycle will depend on the type of upright smoker you have, however for the sake of consistency we should hope that you have put resources into a vertical charcoal smoker.
Vertical electric smokers have something of an alternative component, but the idea continues as before.
At this time, you can use wood chips or charcoal for fuel, but you can also achieve better results if you use both.
This is because charcoal can illuminate in a short time and reliably maintain its intensity. Meanwhile, wood chips can help add flavor to the smoke depending on what wood you used. Simply place your fuel in the charcoal barbecues or charcoal fireplace and then light it with lighter fluid.
You can tell if the charcoal is ready for cooking when it turns dark. As soon as the dim variety begins to appear, you can add wood chips for that unmistakable smoky flavor.
There are several types of wood you can use for smoking (we’ll discuss them later).
STEP #3: FILL THE WATER TRAY WITH WATER
After lighting the fire, the next thing to do is to fill the pan with water. The dish liquid stabilizes the temperature inside the smoker and keeps the meat moist.
However, you can go further by using other types of liquids, such as beer, to add a special flavor to your food. Some even add flavors to the water for that extra scent too.
Regardless of what liquid you pour into the pan of water, the important thing is that it usually contains a liquid to prevent the meat from becoming too dry and tough.
Preferably, you should keep the water level about 3/4 of the way up the plate, just enough so that you don’t have to fill it from time to time while cooking.
Filling it to the brim is also not suggested, as some liquid could spill into the firebox, which could put out the fire before you can even start cooking. Once finished, essentially place it inside the smoker and continue to the next stage.
STEP #4: PLACE THE GRILLS, THEN THE FOOD
When you’ve set up the water pan and firebox, you’re ready to put meat into the cooking chamber. First of all, you need to properly position the traceable barbecues on the waistband of your smoker.
As you place your food, you want to make sure it doesn’t come in contact with the side of the smoker as it could end up absorbing any dirt that may be available on the sides.
This also ensures that smoke and hot air can properly bypass your food. Make sure there is enough space between each piece of meat.
When you’re ready to start smoking, simply close the pellet smoker lid. Be sure to wear heat check gloves to try not to burn your hands.
STEP #5: MONITOR AND MAINTAIN THE DESIRED TEMPERATURE
A fundamental skill to acquire and master while smoking is proper temperature control and change. A couple of hours after you start smoking, you will see the charcoal and wood begin to burn to the ground, causing the temperature inside the smoker to drop.
You can also see this when you start to see thick, dark smoke coming out of the vents.
To increase the temperature, you simply need to add more fuel to the combustion chamber. It is also important to check the water container to see if there is enough water. Assuming you’re running low on water, essentially add more liquid so the meat stays moist and tender.
When checking the temperature of meat, be sure to use a good meat thermometer to get accurate readings.
Most ascending smokers come with their implicit thermometers, however, your readings will usually be a few degrees off.
With a meat thermometer, however, you can get an accurate reading of the temperature of the meat itself rather than the temperature of the smoker.
The cooking time, as well as the correct temperature, will vary depending on how large meat you are cooking, what type of meat it is, and what strong fuel you are using.
For the ribs and brisket, you wouldn’t need to hold anything at 240 degrees Fahrenheit. For chicken and turkey, you can maintain a temperature range between 275 and 300 degrees.
Assuming you need more information, you can refer to these articles from the USDA and FoodSafety.gov regarding various temperature ranges and proposals for some types of meat:
Around the initial hour and a half, you can try adding more fuel in case the intensity drops off. From now on, you don’t need to stress about checking the food or the water pan. Then, after an additional hour and a half, your food should be ready.
STEP #6: REMOVE THE MEAT AND LET IT REST
Simply take it out with utensils and let it rest. Appreciate!
Types of wood that add a distinctive flavor to your food
As mentioned above, you can add a smoky flavor and particular fragrance to your food through wood chips. In any case, this will depend on the type of wood you are using. We suggest using wet rather than dry wood chips for this. Here are some original models:
conclusion
If you have any desire to add a mild, sweet flavor and fragrance to your meat, then Applewood is your ideal choice at that time. It works best when combined with either chicken or turkey meat.
Be that as it may, it will take a while for the smoke from an apple tree to saturate the meat, so expect a considerably longer and slower-than-expected smoking meeting.

